What is Two-Factor Authentication?
Two-Factor Authentication (2FA) is an extra verification process to ensure the privacy protection of your personal information. You’ll see it more often online, especially when using cryptocurrency exchanges, banking apps, and other websites that handle sensitive data.
At your bank, you probably already use this as an SMS code or a device to secure your account safely. This form of extra security has become very important. Hacks, scams, and data breaches happen almost daily, potentially leaking your password. If you have 2FA enabled on a website or app, the hacker won’t be able to access it easily.
Criminals are always looking for ways to access your account, but with 2FA, you can make it very difficult for them!
Google Authenticator
Google Authenticator is the most widely used 2FA mobile app in the cryptocurrency world. Every good website, app, exchange, and wallet will encourage you to set up 2FA when registering an account. You protect your account from access by third parties, which is also in their interest. It prevents support tickets, reputational damage, and the loss of customers or investors.
If someone knows your email address and password, they can access your personal information, including your bank account. When 2FA is activated, that person also needs physical access to your phone to log in. If a website accepts 2FA, it is advisable to use it as well. Google Authenticator is a widely used application for 2FA, but there are also other solutions. Protecting multiple accounts is no problem at all. The app is available for iOS (iPhone) and Android devices.
This is an example of the Google Authenticator, which generates the 2FA codes:
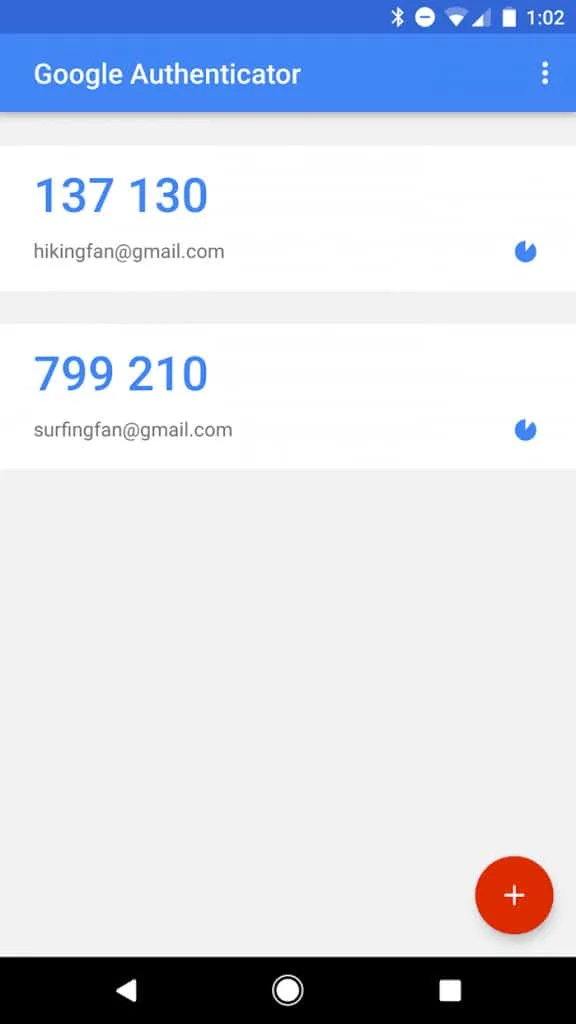
Source: Google Play Store
How to Activate 2FA Using Google Authenticator
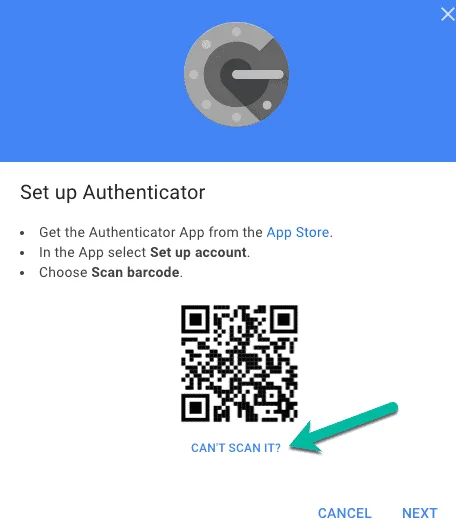
When you turn on 2FA on a website, a QR code is displayed to scan with the Google Authenticator app. Usually, there is also a code to enter manually on your phone as an alternative method. If you enter the response code from the app on the website, 2FA is activated.
Here is an example:
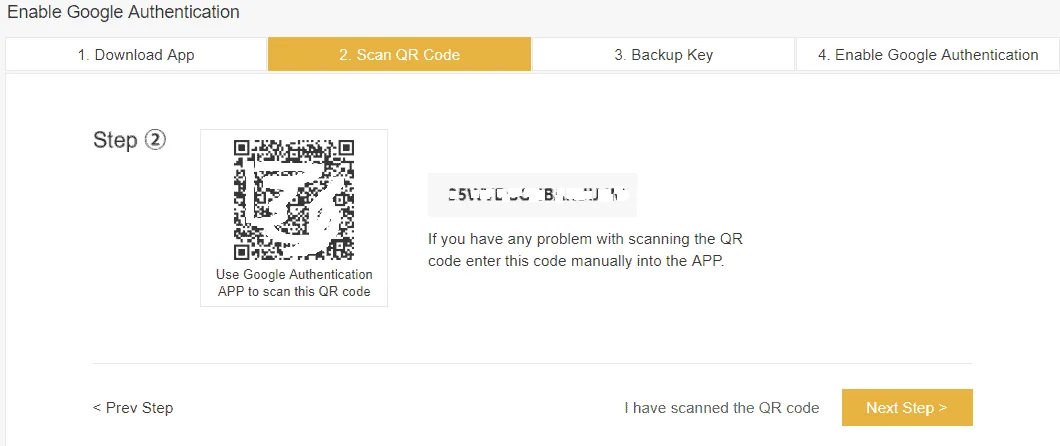
Source: support.binance.com
Google Authenticator Cloud Backup (New Feature)
In April 2023, Google introduced a major update to the Authenticator app: cloud sync and backup. This feature allows you to back up your 2FA codes to your Google Account and sync them across multiple devices.
How Cloud Backup Works
When you enable cloud sync:
- Your 2FA codes are automatically backed up to your Google Account
- You can access your codes on multiple devices (phones, tablets) logged into the same Google Account
- If you lose your phone or get a new one, simply log in to restore all your codes instantly
- The app received a colorful new icon with this update
How to Enable Cloud Sync
- Update Google Authenticator to the latest version
- Open the app and tap on your profile icon
- Sign in with your Google Account
- Your codes will automatically sync to the cloud
Important Security Warning
While cloud backup is convenient, there’s a significant security concern you should be aware of: Google Authenticator’s cloud sync does not use end-to-end encryption (E2EE).
What does this mean?
- Google can technically see your 2FA secrets stored on their servers
- If someone gains access to your Google Account, they could potentially access all your 2FA codes
- Security researchers have advised caution when using this feature
Google has stated they plan to add end-to-end encryption “in the future,” but as of 2026, this has still not been implemented.
Should You Use Cloud Backup?
Use cloud backup if:
- Convenience is your priority
- You have strong security on your Google Account (strong password + 2FA on Google itself)
- You’ve lost access to accounts before due to a broken phone
Consider manual backups instead if:
- You handle highly sensitive accounts (large crypto holdings, business accounts)
- Maximum security is your priority
- You’re uncomfortable with Google having access to your 2FA secrets
The good news: cloud sync is optional. You can still use Google Authenticator without signing in or syncing, and manage your backups manually using the methods described below.
Manual Backup Options (Recommended for Maximum Security)
Whether you choose not to use cloud sync, or you want an additional backup layer, these four manual methods remain the most secure way to protect your 2FA codes.
Before you finally activate 2FA by entering the response code, it is important to back up the QR code and the written secret code. Here are four backup options with their advantages and disadvantages.
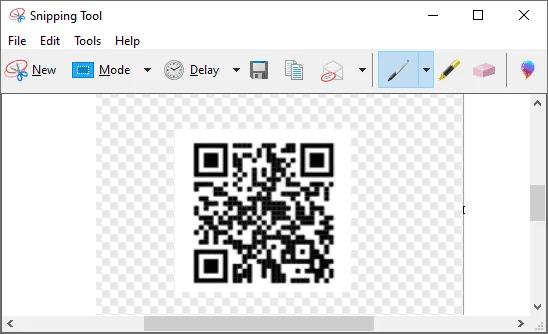
#1 Screenshot
Make a screenshot of the QR code and the written code (if shown). With a new phone, you can rescan or re-enter the code to gain back access.
Making a screenshot on Windows can be done with the ‘print screen’ button on your keyboard to paste it in Microsoft Paint (mspaint.exe) or otherwise with the Snipping Tool, which can be found in the start menu.
Making a screenshot on Apple (macOS) can be done by pressing COMMAND+SHIFT+3 for a full-screen screenshot or with COMMAND+SHIFT+4 for selection. The files are usually stored on your desktop with a file name like ‘Screenshot + date.PNG’.
Advantage: It is easy and quick.
Disadvantage: The secret code is stored on your computer, where a hacker or a virus could find it.
Tip: Move the files to a USB stick and store it securely.
#2 Print
Print the page where the QR code and the written code are displayed. Scan the QR code from the paper to test if it works. Also, keep it in a safe and dry place.
Advantage: The secret code is no longer present on the computer, which solves the disadvantage of option 1.
Disadvantage: You do need a printer. Fewer and fewer people own one these days. In addition, you must store the printed page in a secure and dry place to prevent unauthorized people from gaining access to it and ensure it remains readable.
#3 Extra Mobile Phone
Do you still have a second mobile phone at your disposal? For example, one from your work, your partner’s, or an old one lying around? Then you can also use that mobile phone to scan the QR code or enter it manually.
Advantage: You are back up and running quickly. And it is very practical if you want to log in—just grab whichever phone is nearby!
Disadvantage: If you often have both phones together, they can be stolen or broken due to a calamity.

#4 Write It Down
Write the code down the good old-fashioned way with pen and paper!
Advantage: You don’t need a printer or a second mobile phone, and it’s 100% offline secure.
Tip: Double-check whether you have written the code down correctly, and make sure you can read your handwriting!
Disadvantage: Some websites only display the QR code. You cannot write those down. Fortunately, more and more websites show both versions: QR and secret code.

My Phone is Broken… Now What?
If you’ve enabled cloud sync, recovering your codes is easy: simply install Google Authenticator on your new phone, sign in with your Google Account, and all your codes will be restored automatically.
If you haven’t enabled cloud sync and don’t have a backup, you will no longer have access to all the sites where you have activated 2FA. You will then have to prove your identity per website via their support to reactivate your Google Authenticator. With crypto exchanges, this can sometimes take weeks!
This is why having at least one backup method in place is so important.
Activated 2FA, but Forgot to Backup or Lost It?
If the 2FA with Google Authenticator is completely set up on a website, you will need to re-activate it to make a backup. Usually, a website does have the possibility to turn off the 2FA. This will only be possible if you still have access to the mobile phone that is connected to it.
When you turn it off, you will be asked for the code generated on your mobile, just like when you log in. After this, you can re-activate it and make the backup using the options mentioned above.
Transfer Google Authenticator to a New Phone (Android)
For Android users, there’s a built-in method to transfer all your 2FA codes to a new phone. This is a great and convenient feature that will save you a lot of time because it transfers all your codes at once.
Alternatively, if you have cloud sync enabled, your codes will automatically appear when you sign in on your new device.
How does the manual transfer work? The app generates a special QR code containing all the 2FA backup codes you choose to transfer. Once you scan this QR code on the new Android phone, the codes will be moved over.
Step-by-Step Guide (Android)
- First, download the Google Authenticator app on your new phone.
- Open the Google Authenticator app on your old phone.
- Go to the settings, which usually look like 3 dots or 3 lines (hamburger menu).
- Choose the option ‘Transfer accounts’ (see screenshot below).
- Select the option ‘Export accounts’.
- You might be asked to verify it’s you by entering your phone’s PIN code or fingerprint.
- Now select the accounts you want to transfer and tap ‘Next’.
- On your new phone, go to settings like in step 3 and choose ‘Import accounts’.
- Finally, scan the QR code on your old phone, and the selected codes will be transferred.
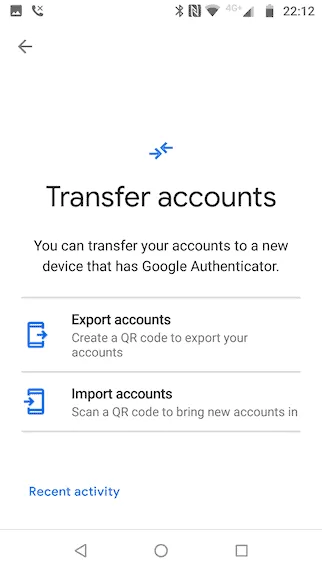
Source: Google Authenticator App
Accounts Exported Warning
You might see a notification on your old phone saying, ‘Accounts were recently exported’. This is to warn you that this happened because if you did not do it yourself, somebody now has all your codes!
Although they still need your password for each website or app to access it, you need to take action. The best approach is to change your password and reset the 2FA everywhere.
Transfer Google Authenticator to a New iPhone
Note: If you have cloud sync enabled, simply sign in with your Google Account on your new iPhone and your codes will appear automatically. The following instructions are for manual transfer or for your Google account specifically.
It is rather easy to move your Google Authenticator to another phone via their website.
For all the other accounts, you will need to go through the process of disabling and re-enabling the 2FA again (unless you use cloud sync).
Step-by-Step Guide (iPhone)
- First, go to the Google 2FA page.
- Click the ‘Get started’ button.
- Choose the Google account you want to use and enter your password.
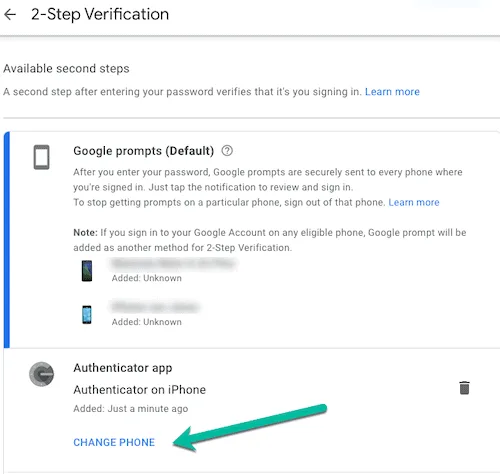
- Find the section ‘Authenticator app’ and click ‘Change phone’, see the screenshot below.
- Now either scan the QR code on your new phone to finish it or enter the ‘secret key’ that appears after clicking ‘Can’t see it?’
Step 4:
Step 5:
Source: Google Authenticator 2FA page and the App
WARNING: All of the above operations are at your own risk, so take your time, double-check everything, and test what you are doing.
Alternatives to Google Authenticator
If you’re looking for an alternative authentication app—especially one with better security features—here are two popular choices:
Authy
Authy is often recommended by security experts because it offers end-to-end encryption for cloud backups. This means even Authy cannot see your 2FA secrets, unlike Google Authenticator.
Key features:
- End-to-end encrypted cloud backups
- Multi-device sync
- Available on iOS, Android, Windows, Mac, and Linux (desktop version)
- Free to use
Microsoft Authenticator
Microsoft Authenticator offers similar features to Google Authenticator, including cloud backup and one-time password generation.
Key features:
- Cloud backup to Microsoft account
- Approving login requests via notification
- Available on iOS and Android
- Free on App Store and Google Play
Which Should You Choose?
| Feature | Google Authenticator | Authy | Microsoft Authenticator |
|---|---|---|---|
| Cloud Backup | Yes | Yes | Yes |
| End-to-End Encryption | No | Yes | Partial |
| Desktop App | No | Yes | No |
| Multi-Device Sync | Yes | Yes | Yes |
Our recommendation: If security is your top priority, consider Authy for its end-to-end encryption. If you’re already deep in the Google ecosystem and want convenience, Google Authenticator with cloud sync is a solid choice—just make sure your Google Account itself has strong security.
Summary: Best Practices for 2FA Backup
- Always create a backup before finalizing your 2FA setup
- Use cloud sync for convenience, but understand the security trade-offs
- Consider manual backups (screenshot, print, extra phone, or write it down) for maximum security
- Secure your Google Account with a strong password and 2FA if you use cloud sync
- Test your backup to make sure it works before you need it
- Consider Authy if end-to-end encryption is important to you
Stay safe out there!
 Stay Ahead in Crypto